
Setup of the Gaia involves removing it from the crate, powering up and connecting to internet, anchoring the machine in place, and configuring the Admin. Let's get started.
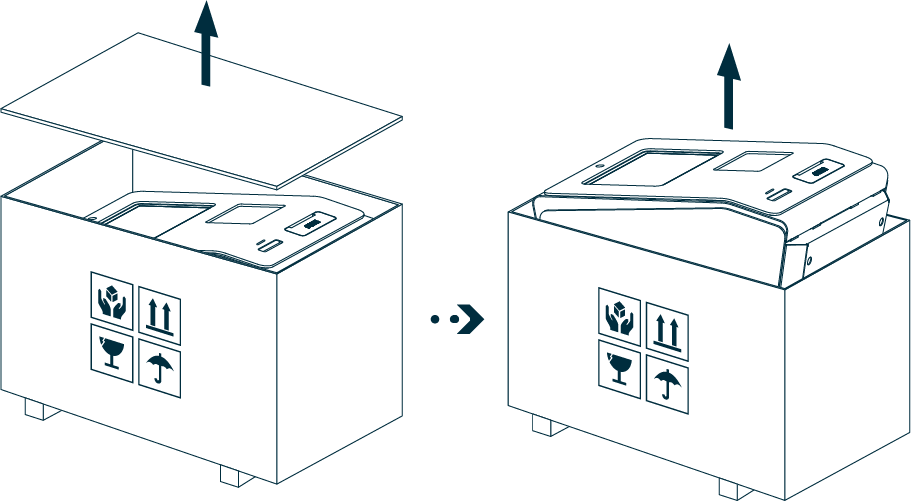
Opening the crate
To uncrate your Gaia, with the crate flat, begin by removing its top panel. With assistance, carefully lift the Gaia at both ends up and out of the crate, and onto a solid, steady surface.
Accessories kit
Inside the crate, you'll find an accessories box, containing:
- 1 x microfibre cloth
- 4 x bolts
- 2 x lock keys
- 1 x keycard

Save the keycard that comes in this box and securely back up its contents, as the information on it is required to order new keys. Don't mix it with keycards from other cryptomats until you record which one this came from.
The Gaia can be affixed to either a counter with the mounting plate or a wall with the included bolts and mounting bracket, though for purposes of testing, you may keep it upright on a sturdy surface.
Connect to power and internet
Connect power and Ethernet found on the back of the Gaia. It will boot automatically.

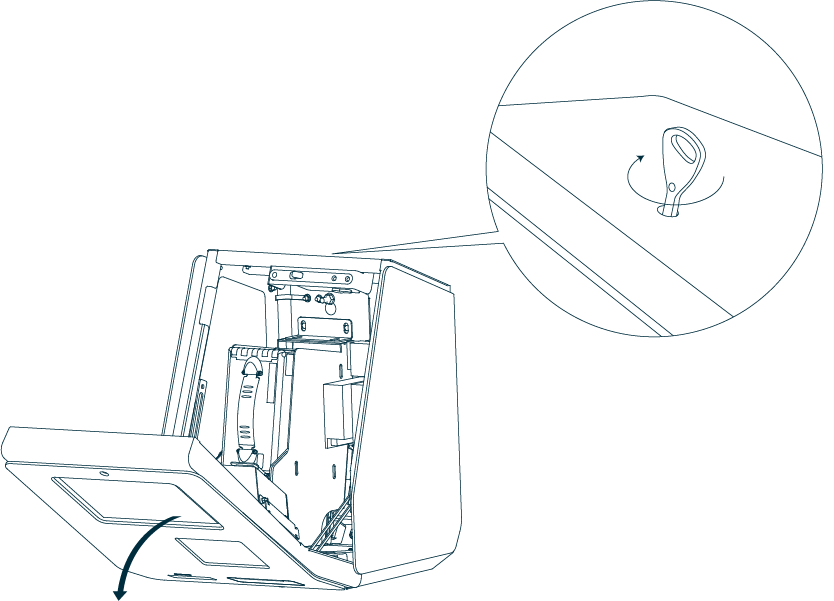
Opening
You may open the Gaia using one of the Abloy keys included in the accessories box. The lock is located on the top of the cryptomat. Turn the key to unlock and gently pull the door down and towards you.
Mounting
The Gaia may be bolted to a counter directly or affixed to a wall with the mounting bracket. Additionally, if you purchased the transport case, we include a mounting plate to screwlessly attach it to a countertop.
Option 1: Countertop without plate
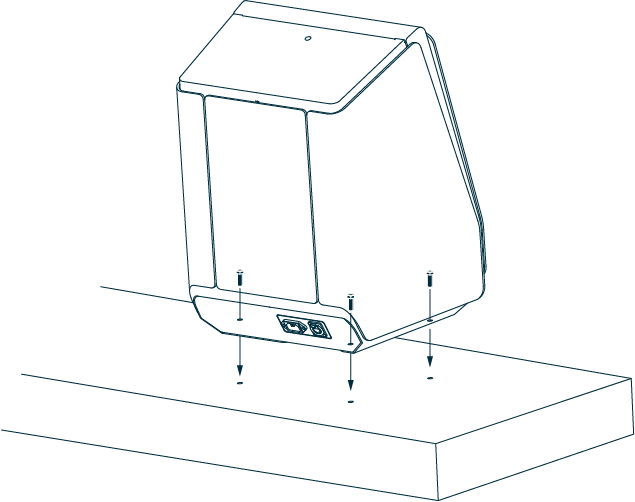
The Gaia can be screwed to a wooden countertop using a suitable wood screw (eg. hexagonal M10) via its pre-drilled mounting holes.
Option 2: Wall Mount

To mount the Gaia to a wall, you must first remove the back panel by unscrewing the four nuts on the inside of the unit.
The included wall mount should be suitably fixed to the wall with the included M8 bolt and anchors after predrilling 8mm holes in the wall at the mounting positions.
Once the mount is securely installed, you can remove the nuts from the two bolts at the top and gently rest the machine on the metal hangers at the base of the mount, before aligning the two bolts at the top with the holes in the rear of the machine. The nuts can then be reattached to the bolts from inside the Gaia to secure the machine to its mount.
Option 3 (included with transport case option): Countertop with plate
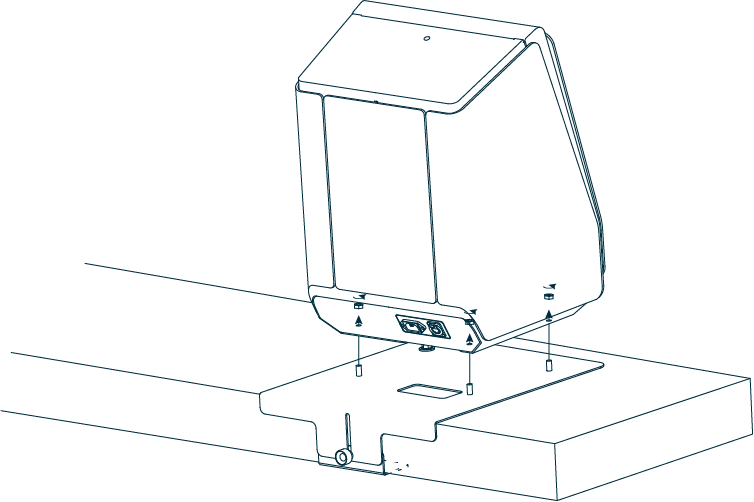
If your machine is designed to travel with you, and you purchased the transport case, we include a mounting plate to attach it to a countertop. Just place the machine onto the protruding bolts and screw the included nuts to tighten it to the machine.
Pairing with your admin
If you haven't yet done so, follow our Admin Setup Guide to create a server which hosts your admin, settings, and wallets.
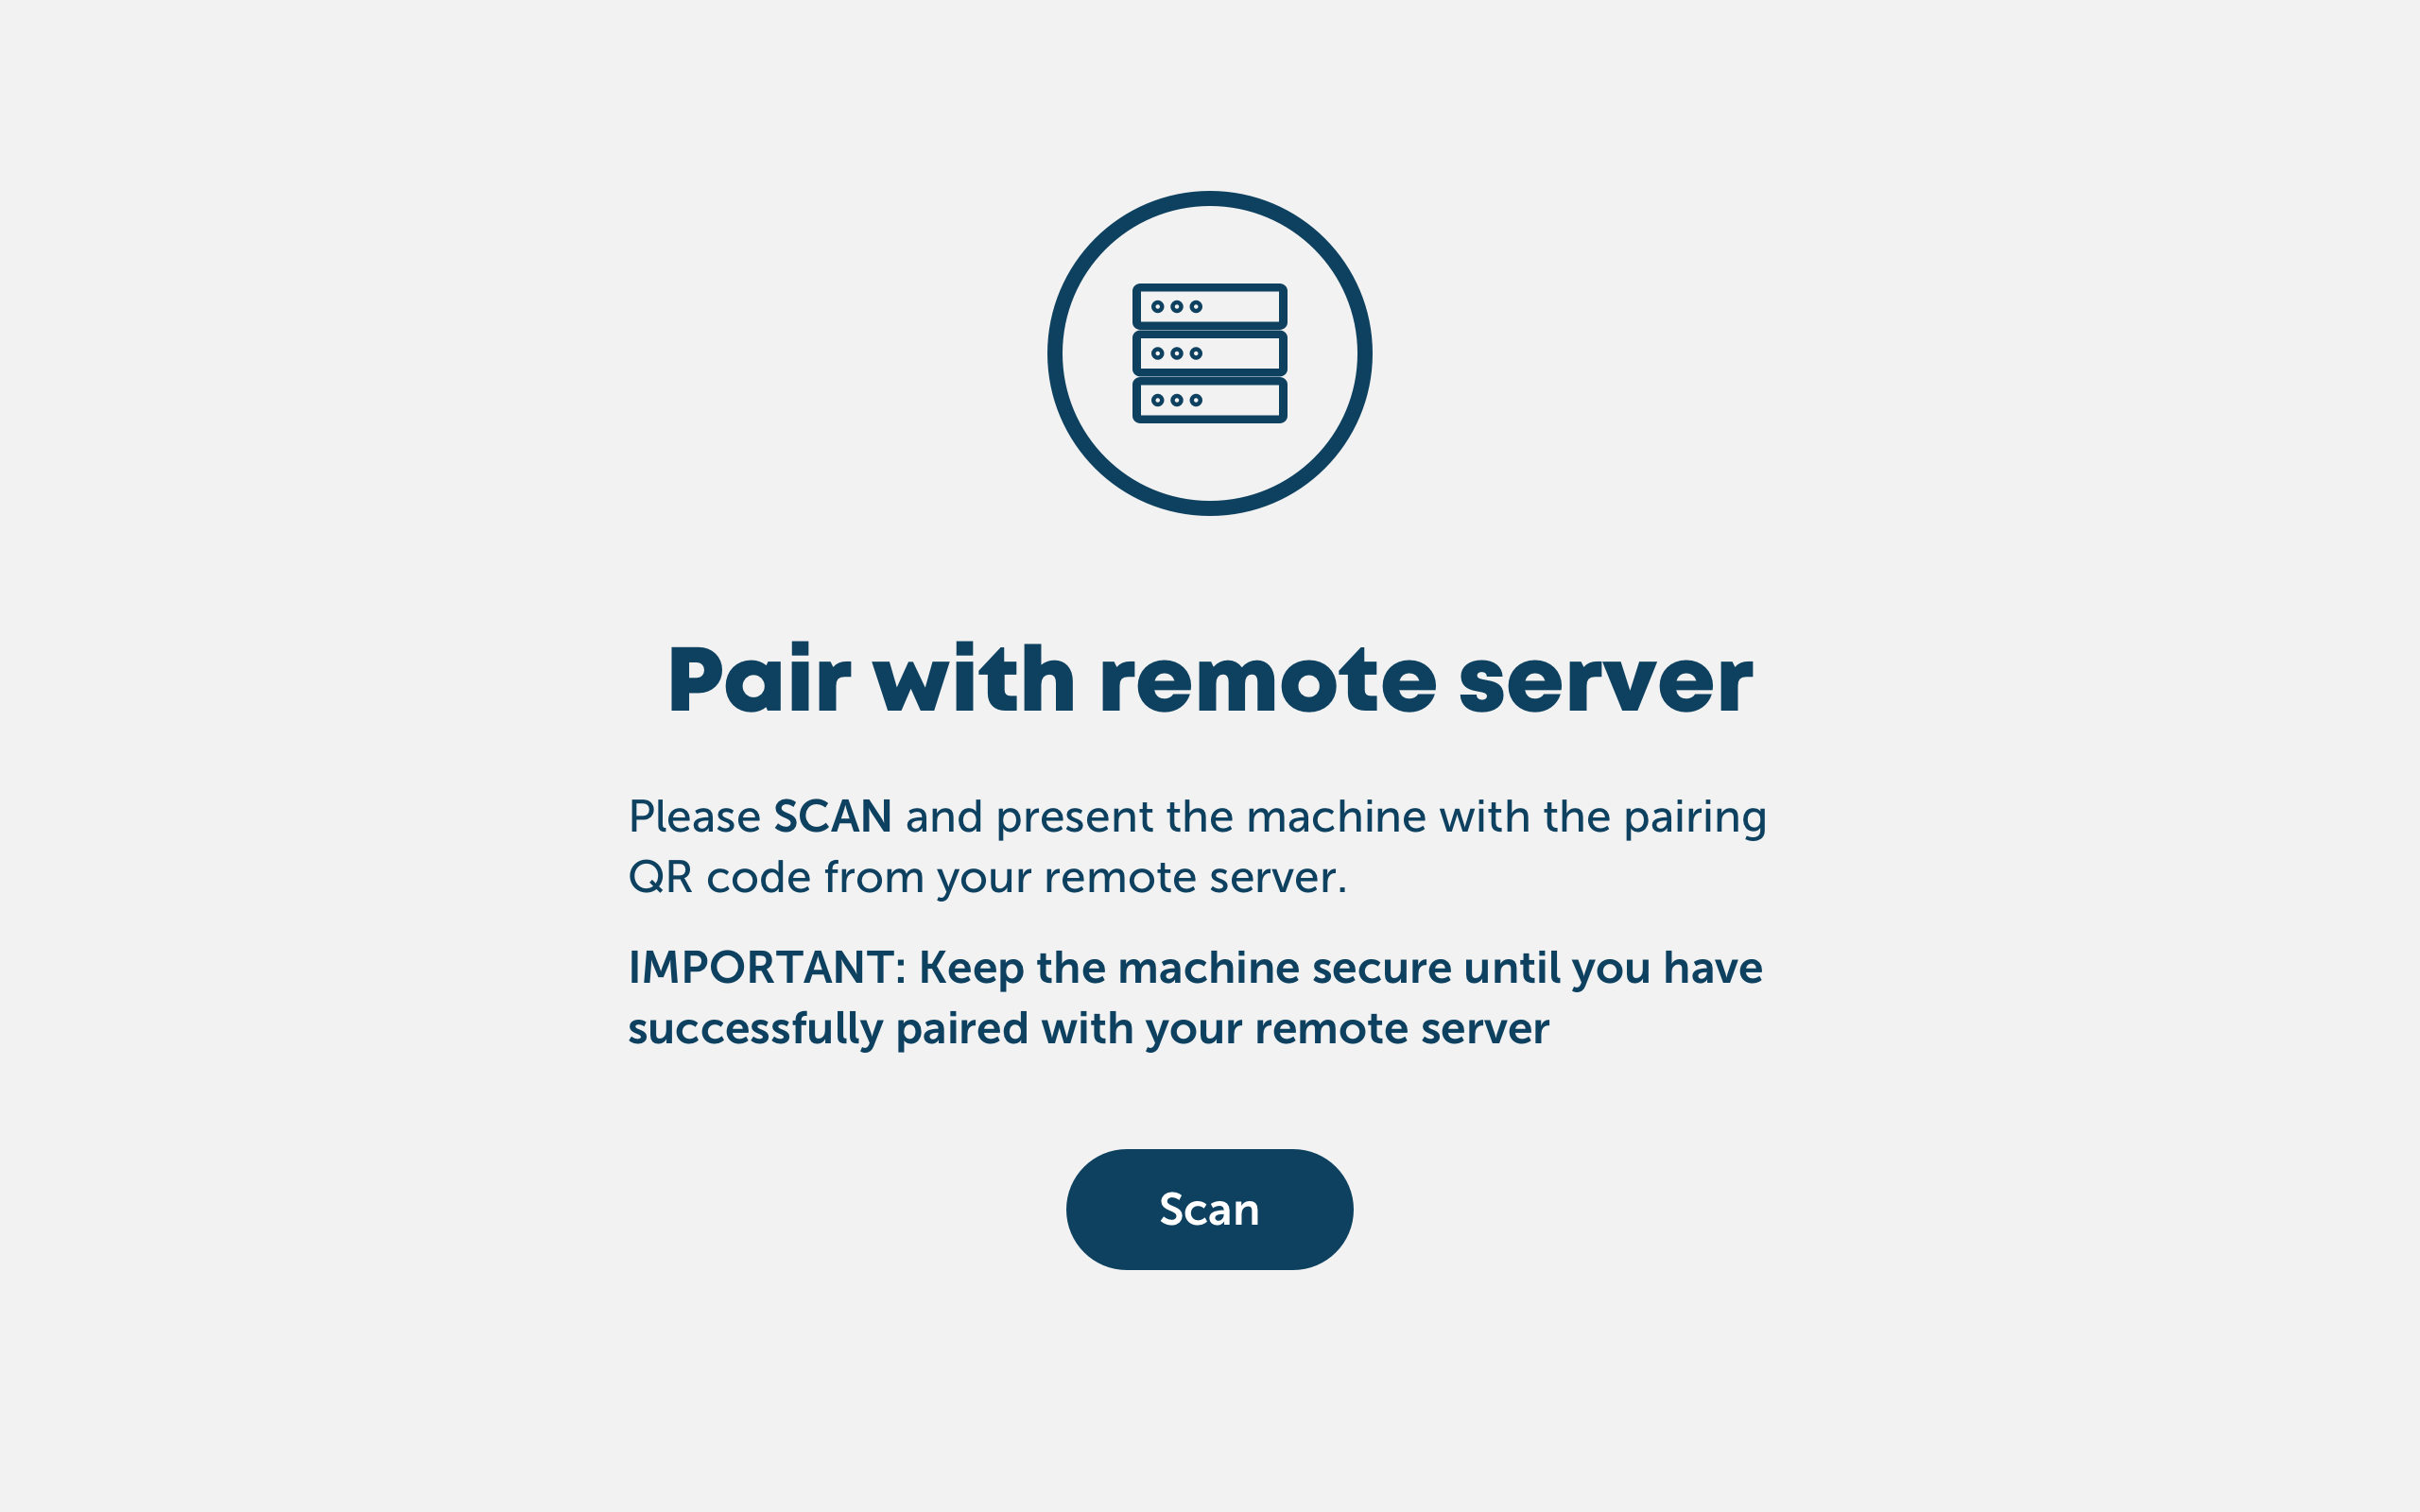
Once you've configured your admin, generate a pairing code from its 'Add a machine' panel and take a photo of the resulting QR code.
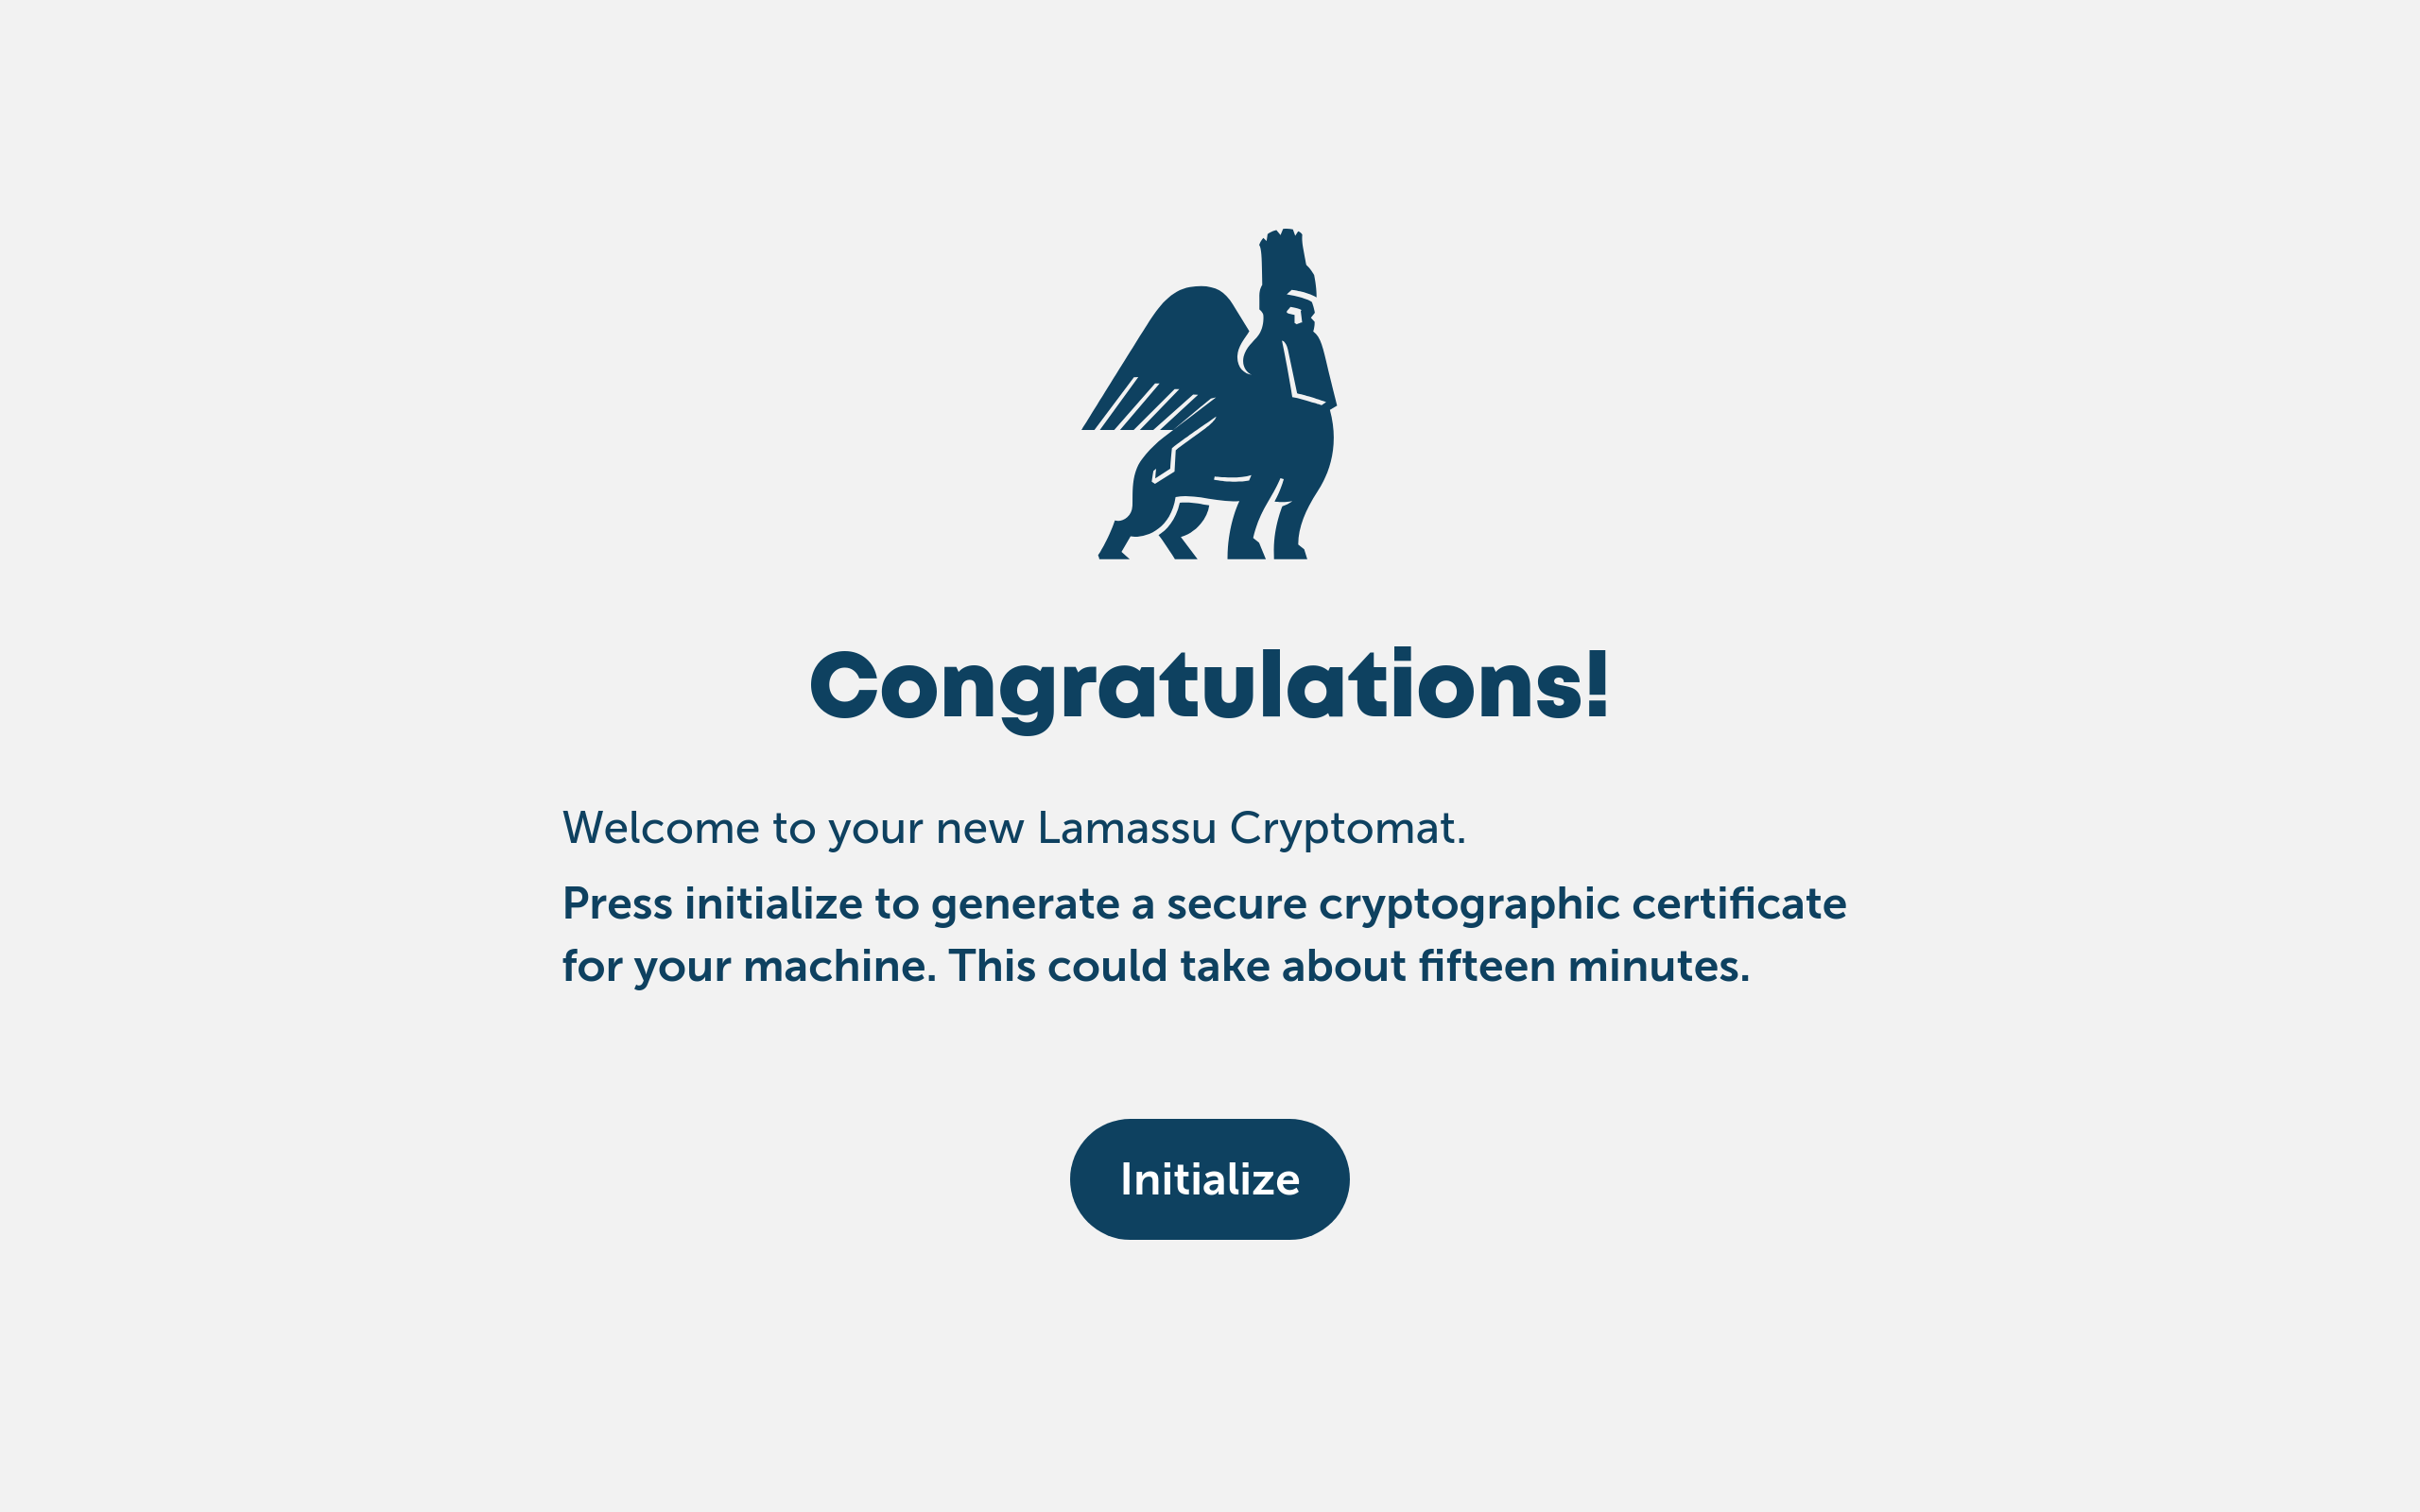
Press the Initialize button on the Gaia's screen.
After about a minute, you'll see a Pairing screen. Press the Scan, and hold up the photo of the pairing QR code to connect it to your admin.
Follow further articles in our Admin Features section to fully configure your machine for transactions, including setting up support for cash-out.
Questions?
Drop us a line at our support desk, and we'll be happy to help!
Follow our support announcements at @LamassuSupport for the latest news, updates, and articles.
Comments
0 comments
Article is closed for comments.