Your server uses native wallet nodes, meaning your coins and keys are held on your server instead of with a third-party.
For each coin you offer, you'll need to install their associated wallets, then configure your Admin for them, following the steps below.
⚠️ NOTE: Since your coins are stored solely on your server, it's important that you regularly back up your wallets (see the last section of this article).
Video overview
Before proceeding to the steps that follow, please watch our video showing a full setup of the wallets below. This will help familiarise you with the full process, and you're welcome to follow along!
Installation
During the initial setup of your server, you likely already installed some wallet nodes.
If you did not, or wish to install additional coins, you may set them up by running the following in your server's terminal:
lamassu-coins
Use the keyboard up/down arrow keys, and space bar to select coins, then hit Enter to install.

- Only install the coins you actually intend on using.
- Running and synchronizing these coins' blockchains is an intensive process.
- If the CPU/RAM configuration of your droplet cannot handle syncing 6 blockchains and running their wallets, you will experience instability on both the server and machine.
Notes on appropriate droplet settings are located in the admin setup article.
Blockchain Synchronization
Syncing the blockchains will take between 24 – 48 hours.
During this time, you may deposit funds to the wallets' addresses, however they will not be seen or available for sale until the blockchains have fully synchronized.
To check the current state of synchronization, you may check the output of the commands found here: Checking Wallet Synchronization
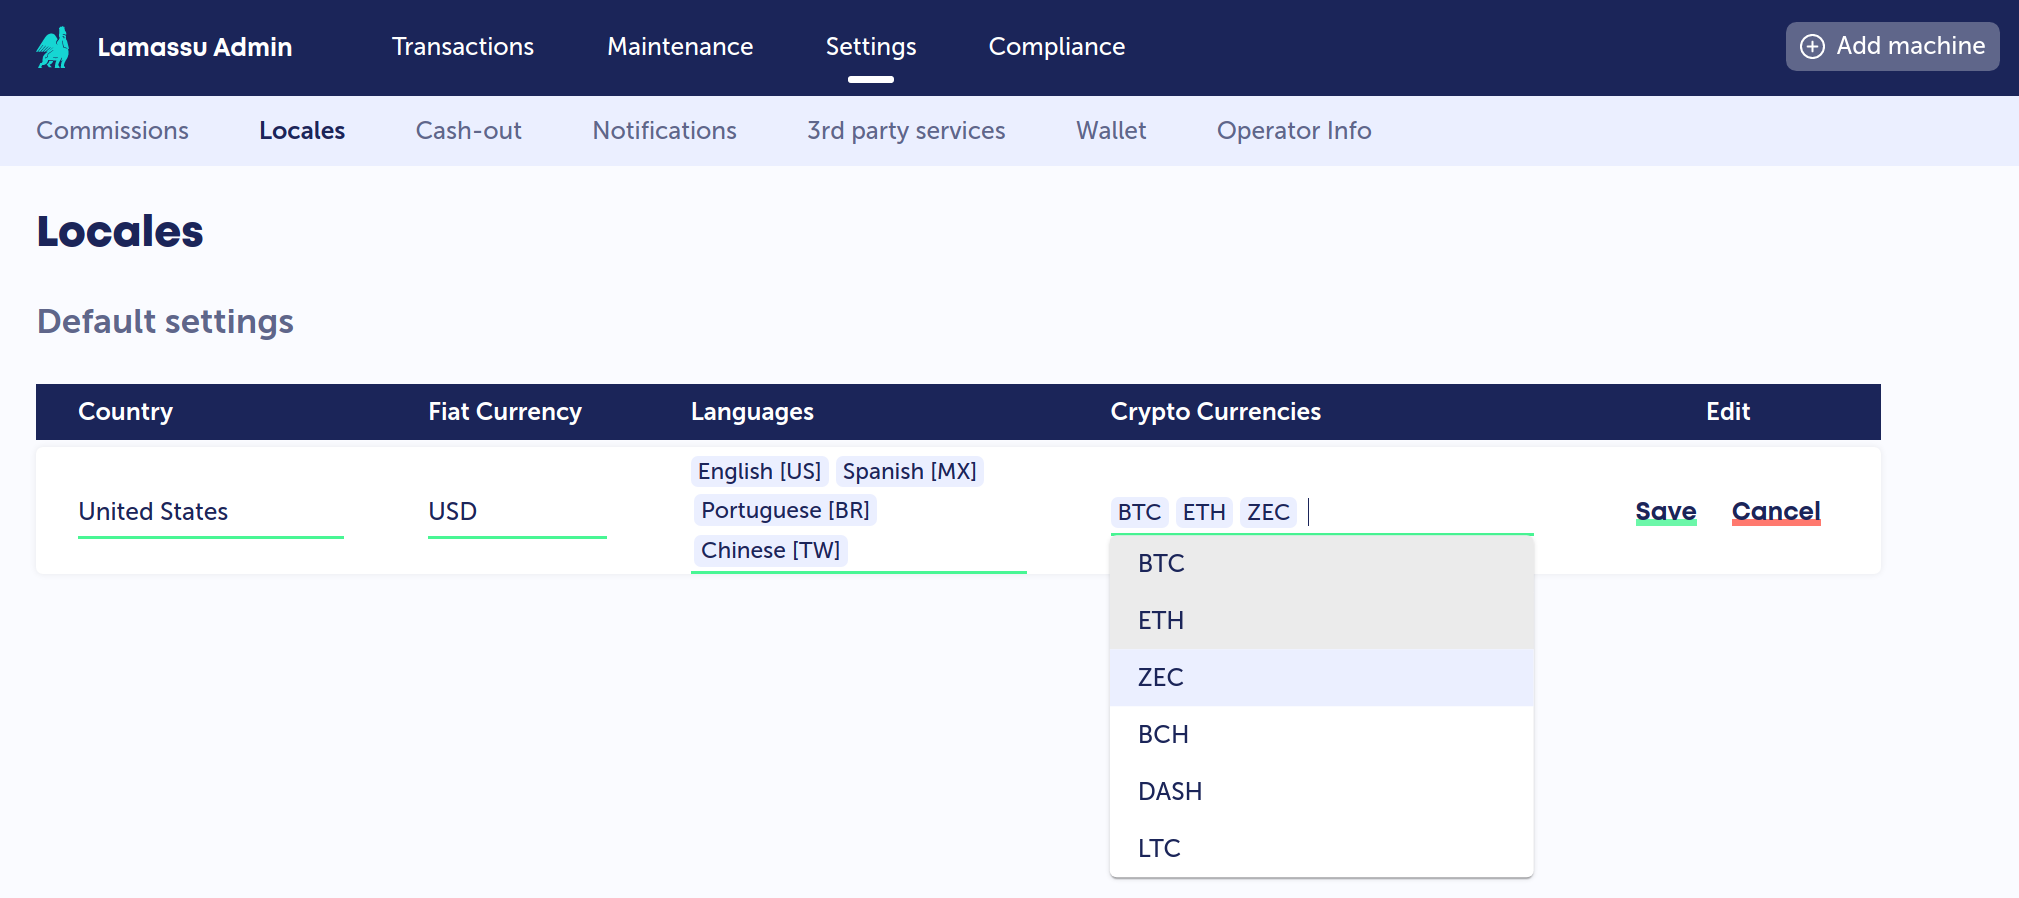
Locales Panel
After installing, enable the appropriate coins within the 'Settings > Locales' menu. Click on the pencil icon to edit the field, select the crypto currencies you are going to support from the dropdown menu and click the Save button.
You can use the '+Add override' button for different settings on specific machines:
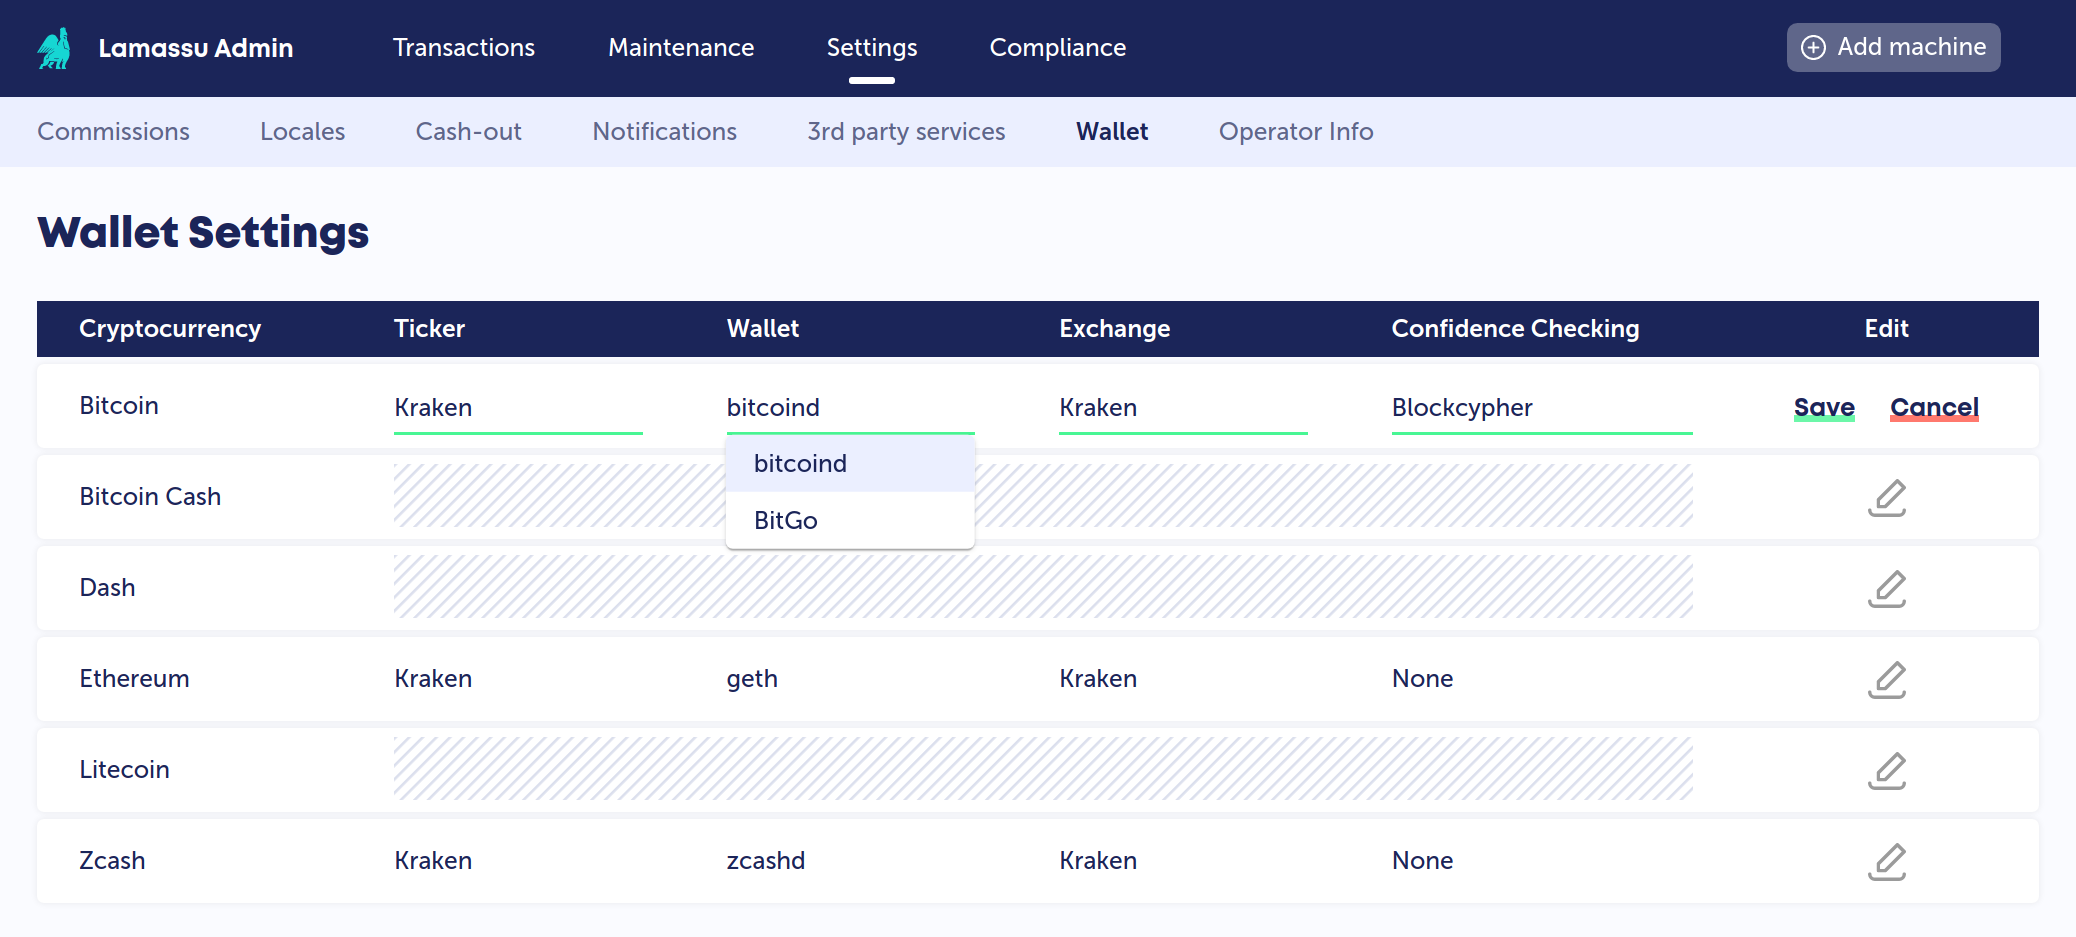
Wallet Settings Panel
After clicking Save above, go to the 'Settings > Wallet' panel. For each coin you've added, click on the pencil icon, select a Ticker (price source) and the Wallet (zcashd, geth, etc.), then click the Save button to submit the changes.
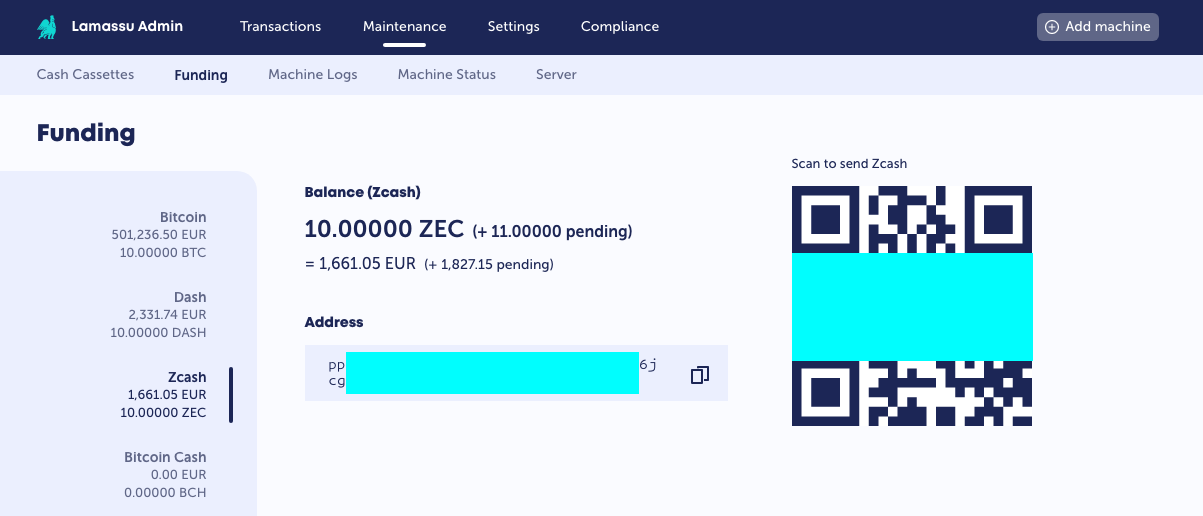
Funding
Navigate to the 'Maintenance > Funding' section of your admin, then select the coin's wallet you'd like to fund on the left menu.
Before sending funds, please ensure your 'Wallet Settings' panel has the appropriate wallet client selected for live transactions and that your blockchains have synced.
Deposit only small amounts until you've successfully conducted test transactions. Deposits will require one confirmation before being available to dispense.
Backing up your wallets
Ensuring that you can recover the funds held on your wallets is very important. Please follow our guide on Wallet Backups.
Comments
0 comments
Article is closed for comments.